我们就拿一位网友的例子来说明这个问题,首先看段使用ExtAspNet的代码:
<ext:PageManager ID=”PageManager1″ runat=”server”></ext:PageManager>
<ext:Panel ID=”Panel1″ runat=”server” BodyPadding=”5px” EnableBackgroundColor=”true”
ShowBorder=”true” ShowHeader=”true” Title=”物料主檔查詢” Width=”700″>
<ext:CheckBox ID=”CheckBox1″ runat=”server” ShowLabel=”false” Text=”我確定以下復合條件均不需要輸入”>
</ext:CheckBox>
<ext:GroupPanel ID=”GroupPanel1″ runat=”server” AutoHeight=”true” Title=”查詢條件”>
<ext:Form ID=”Form2″ runat=”server” EnableBackgroundColor=”true” ShowHeader=”false”
ShowBorder=”false”>
<ext:FormRow>
<ext:DropDownList ID=”DropDownList1″ runat=”server” ShowLabel=”false” Width=”130″>
<ext:ListItem Text=”物料編號” Value=”itemcode” Selected=”true” />
<ext:ListItem Text=”規格” Value=”specify” />
</ext:DropDownList>
<ext:DropDownList ID=”DropDownList2″ runat=”server” ShowLabel=”false” Width=”80″>
<ext:ListItem Text=”等于” Value=”=” Selected=”true” />
<ext:ListItem Text=”不等于” Value=”!=” />
</ext:DropDownList>
<ext:TextBox ID=”TextBox1″ runat=”server” ShowLabel=”false” Width=”160″>
</ext:TextBox>
<ext:TextBox ID=”TextBox2″ runat=”server” ShowLabel=”false” Width=”130″ Readonly=”true”>
</ext:TextBox>
</ext:FormRow>
<ext:FormRow>
<ext:DropDownList ID=”DropDownList3″ runat=”server” ShowLabel=”false” Width=”130″>
<ext:ListItem Text=”” Value=”” Selected=”true” />
<ext:ListItem Text=”并且(AND)” Value=”AND” />
<ext:ListItem Text=”或者(OR)” Value=”OR” />
</ext:DropDownList>
<ext:Button ID=”Button1″ runat=”server” Text=”增加條件”>
</ext:Button>
<ext:Button ID=”Button2″ runat=”server” Text=”刪除條件”>
</ext:Button>
<ext:Button ID=”Button3″ runat=”server” Text=”保存條件”>
</ext:Button>
<ext:Button ID=”Button4″ runat=”server” Text=”提取條件”>
</ext:Button>
</ext:FormRow>
<ext:FormRow>
<ext:TextArea ID=”TextArea1″ runat=”server” Height=”80px” ShowLabel=”false” Text=””
Readonly=”true”>
</ext:TextArea>
</ext:FormRow>
</ext:Form>
</ext:GroupPanel>
<ext:GroupPanel ID=”GroupPanel2″ runat=”server” AutoHeight=”true” Title=”排序欄位”>
<ext:Form ID=”Form3″ runat=”server” BodyPadding=”5px” EnableBackgroundColor=”true”
ShowHeader=”false” ShowBorder=”false”>
<ext:FormRow>
<ext:DropDownList ID=”DropDownList4″ runat=”server” ShowLabel=”false” Width=”130″>
<ext:ListItem Text=”物料編號” Value=”itemcode” Selected=”true” />
<ext:ListItem Text=”物料模型” Value=”wmode” />
</ext:DropDownList>
<ext:Button ID=”Button5″ runat=”server” Text=”增加欄位”>
</ext:Button>
<ext:Button ID=”Button6″ runat=”server” Text=”刪除欄位”>
</ext:Button>
</ext:FormRow>
<ext:FormRow>
<ext:TextArea ID=”TextArea2″ runat=”server” Height=”50px” ShowLabel=”false” Text=””
Readonly=”true”>
</ext:TextArea>
</ext:FormRow>
</ext:Form>
</ext:GroupPanel>
</ext:Panel>
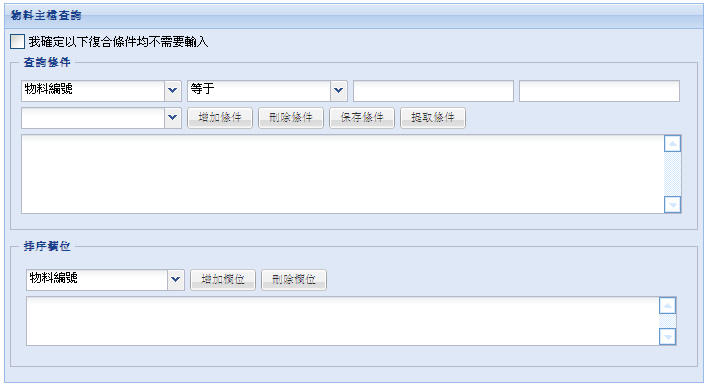
生成的页面截图为:
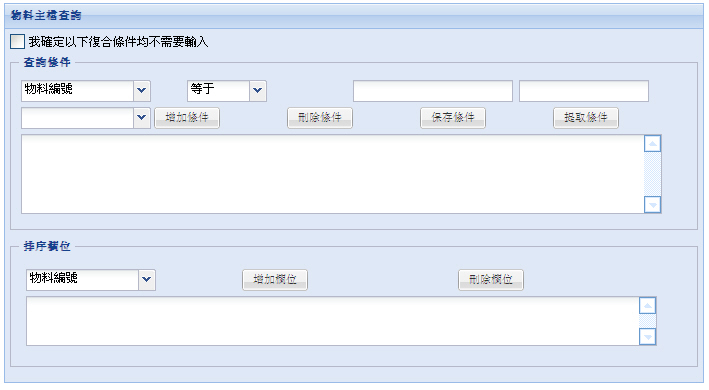
这里有两个地方不满意,一个是下拉列表和文本框的宽度不一样,难看。其次是希望按钮能紧密排列,而不是每个按钮占据一列的位置。
第一个问题很好解决,ExtAspNet的Form或者SimpleForm中的控件能自适应大小,不需要手工指定宽度,只需要把所有下拉列表和文本框的宽度去掉就好了。
比如:
改成:
现在的页面截图:
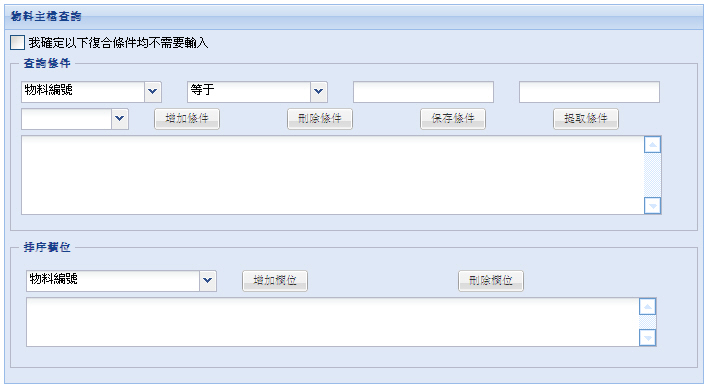
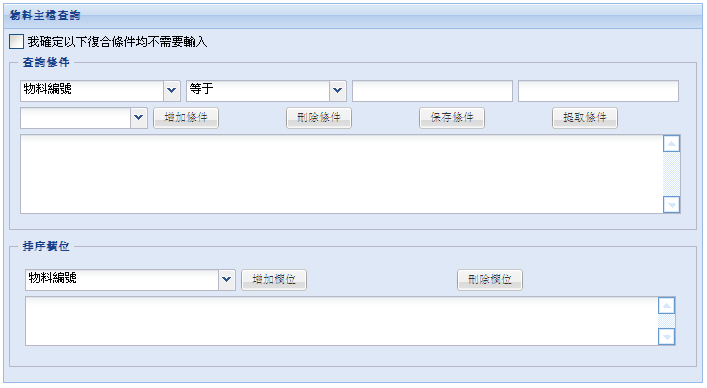
如果觉得文本框和下拉列表之间的距离有点宽了,可以设置ext:PageManager 的属性 FormOffsetRight, 如下:
FormOffsetRight 可以作为一个全局变量在 web.config 中配置,也可以通过每个页面的PageManager的属性来覆盖设置。
这个参数表示表单中每个控件距离右侧的距离,默认是25px,我们这里将本页面中此参数修改为5px,再看下此时的页面截图:
至于第二个问题,如果使按钮一个接一个的排列就需要一点小技巧。
我们可以将这些按钮放在一个Panel中(相当于给这些按钮一个分组),如下代码所示:
此时的页面截图:
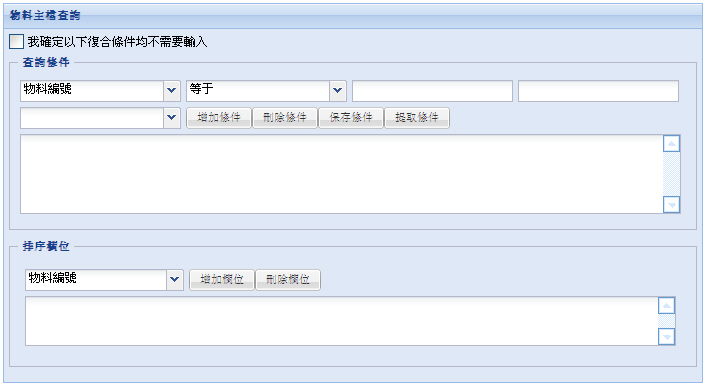
你可能注意到ext:Panel 中的EnableBackgroundColor=”true”属性了,其实ext:Panel的默认背景色为白色,
但是有时候,我们希望是浅蓝色(Theme=blue的时候),而这个属性正是做这个事情的。
由此也可以看出ExtAspNet是从实际项目最常用需求出发设计开发的。
现在有另外一个问题,按钮之间排列的太紧,希望他们之间能有一定的空隙(比如5px),怎么办呢?
我们可以设置ext:Button的CssStyle属性,简单的通过CSS样式来达到效果:
或者我们在页面上定义一个Class,然后在Button中引用也行,如下:
buttonMargin
{
.margin-right: 5px;
}
</style>
在ext:Button中这样使用:
现在的页面效果为:
好了,现在的界面基本达到我们的要求了。


